- Published on
Spec-Driven Development: Stop Vibe Coding
- Authors

- Name
- Alfredo Perez
- @alfrodo_perez
I want to add a feature to my VS Code extension that highlights the current plan step in the workflow progress bar.
My first instinct? Just start coding... but what if we can vibe code it? Ok, let's give it a shot. Open Claude Code, type "highlight the current plan step in the workflow progress bar and order the sub-menu so Plan is first," and let the AI figure it out. But then the questions start flooding in: How should the highlighting work visually? Should it persist across sessions? What about the sub-menu ordering—alphabetical or by workflow phase? How does the extension communicate between the sidebar and the WebView?
Here's the thing: I could just prompt the AI and hope it makes the right assumptions. Or I could spend the next hour going back and forth, correcting misunderstandings, and ending up with something that "works" but isn't quite what I had in mind.
There's a better way. Let me show you how I approached this differently using spec-driven development.
What is "Vibe Coding"?
You know the feeling. You have a rough idea of what you want to build, you open your AI coding assistant, type something like "Highlight the current step in the progress bar," and hope for the best.
The AI starts generating code. It looks reasonable. It compiles. But then you realize—it highlighted the wrong element. Or it used inline styles when you wanted CSS classes. Or it assumed the highlighting should be permanent when you wanted it to update dynamically as users navigate.
So you go back and forth. Re-prompt. Clarify. Debug. Re-prompt again. After an hour of this, you're either frustrated enough to just code it yourself, or you accept something that's "good enough" but not quite right.
This is vibe coding—jumping straight into implementation without making your decisions explicit. And with AI assistants, it happens faster than ever. As Microsoft's spec-driven development post puts it: "Code is inherently a binding artifact—once you write an implementation, it's very hard to decouple from it."
The consequences compound. You spend endless hours going back and forth fixing misunderstandings. There's no documentation of why decisions were made, so each AI session starts from scratch—it doesn't remember your intent. And if you're working with a team? Good luck. Nobody has shared context about what you were actually trying to build.
If you want to see this problem explained in more detail, check out Dan Delamarski's demo of spec-kit where he walks through the full workflow.
The Solution: Spec-Driven Development
Spec-driven development flips the script. Instead of jumping to code, you first make your intent explicit through specifications. These specs become executable artifacts that directly generate implementations.
The core principle: Define what and why before how.
Here's what changes: the AI finally understands your intent because it's working from detailed specifications, not vague prompts. You get fewer iterations to reach the correct implementation. Your specs become living documentation that evolves with your project. Teams can coordinate through shared, reviewable specs—and new team members can onboard by reading them instead of reverse-engineering your code.
Think of it as "version control for architectural thinking."
Tools like Kiro have built their entire IDE around this concept—transforming natural language prompts into detailed specifications, then into functional code, documentation, and tests. GitHub's spec-kit brings this methodology to any AI coding assistant you already use.
Getting Started
Let me walk you through setting up spec-driven development and then show you exactly how I used it to build the plan step highlight feature.
Step 1: Install Prerequisites
You'll need:
- Python 3.11+
- Git
- uv package manager
- An AI coding assistant (Claude Code, GitHub Copilot, Gemini CLI, etc.)
Step 2: Install spec-kit CLI
uv tool install specify-cli --from git+https://github.com/github/spec-kit.git
For more details, check out the spec-kit GitHub repo.
Step 3: Install SpecKit Companion (VS Code Extension)
This extension gives you a visual interface for the spec-driven workflow:
- Open VS Code Extensions
- Search for "SpecKit Companion"
- Install the extension
Or visit: SpecKit Companion on Marketplace
Step 4: Initialize Your Project
specify init my-project --ai claude
# Or in an existing project:
specify init . --here --ai claude
Spec-kit supports 15+ AI assistants including Claude Code, GitHub Copilot, Gemini CLI, Cursor, and more.
I'll be using Claude Code for this demo, but the workflow is the same regardless of which AI you choose.
The Spec-Driven Workflow: Building Plan Step Highlight
Now let's see this in action. I'll walk through each phase of the spec-driven workflow as I build the plan step highlight feature for my VS Code extension. Watch how SpecKit Companion visualizes each step.
Phase 1: Constitution
Before writing any specs, I establish the project's governing principles. The constitution defines non-negotiable constraints that anchor all future decisions.
/speckit.constitution Create principles for SpecKit Companion focused on:
- TypeScript with strict mode enabled
- VS Code Extension API best practices
- WebView communication via message passing
- State updates within 100ms of navigation
- Must integrate with existing workflow editor architecture
This creates .specify/memory/constitution.md with my project principles.
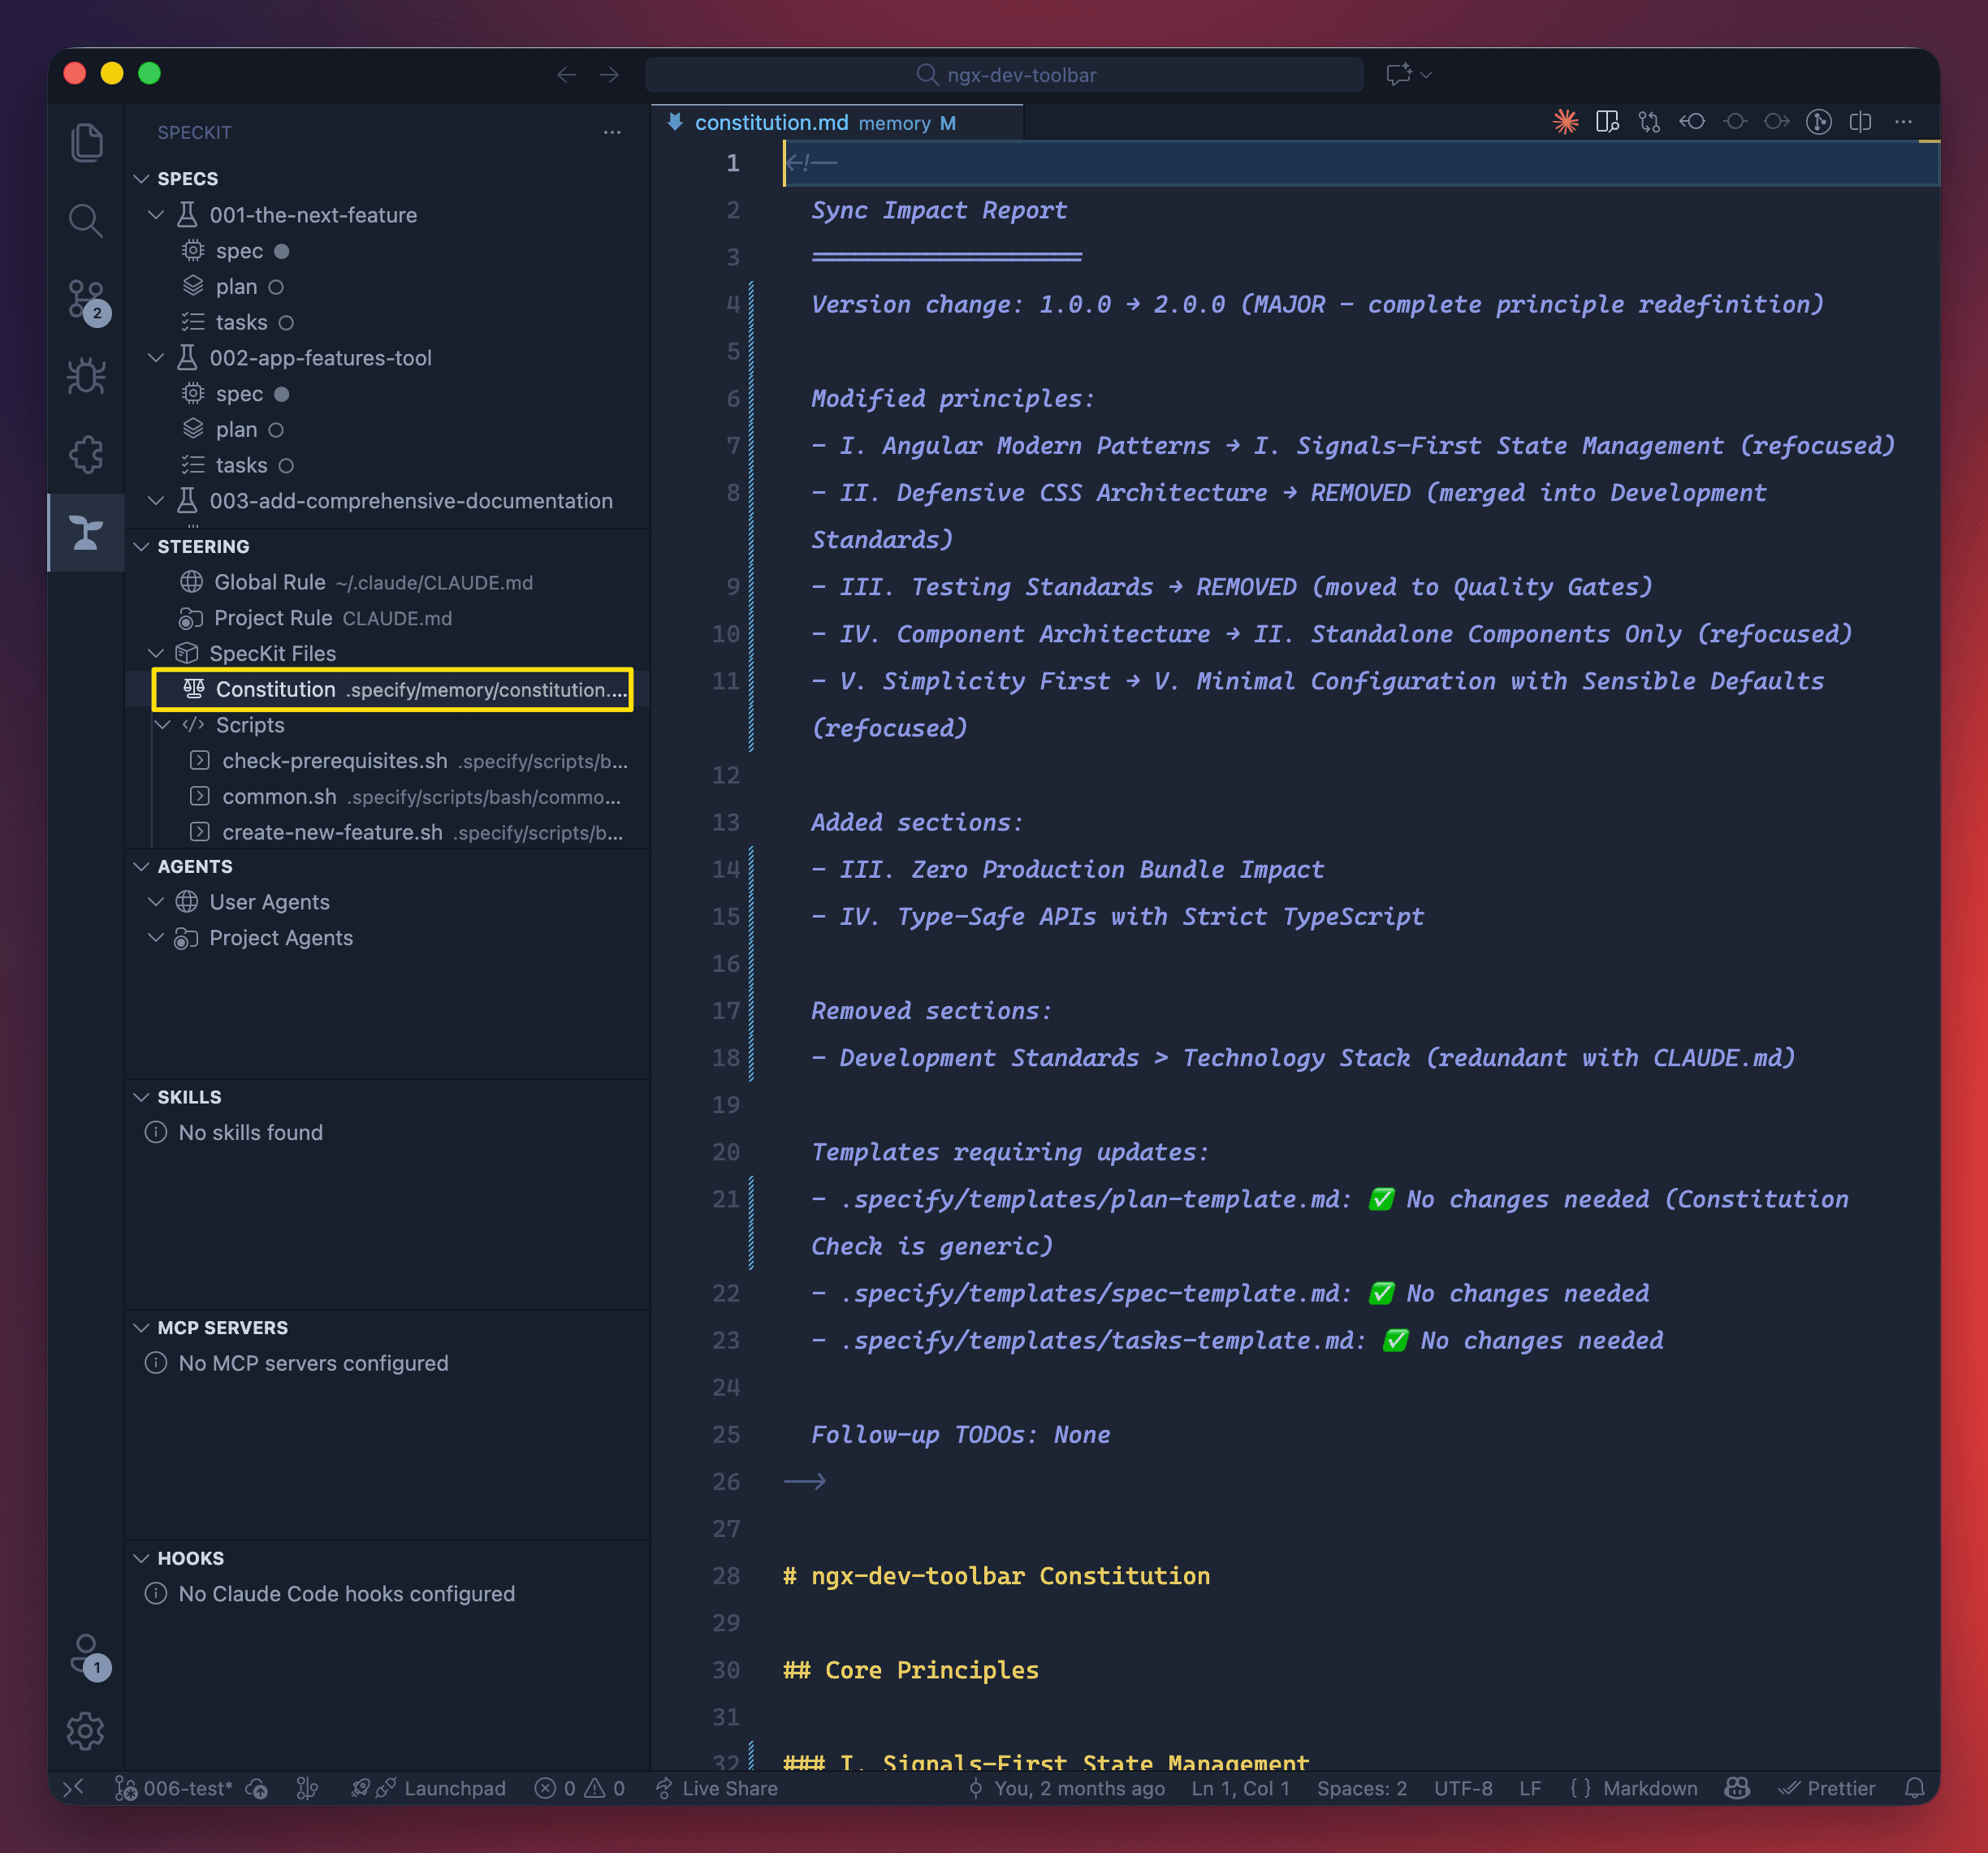
Why does this matter? Every spec I write from now on will reference these principles. When the AI plans the highlight feature, it knows to use proper message passing between extension and WebView, keep state updates performant, and follow the existing architecture patterns.
Phase 2: Specify
Now I define what I want to build—without making technical decisions yet.
In the SpecKit Companion sidebar, I click the "+" button to create a new spec. This opens the "Create New Spec" dialog where I describe what I want:
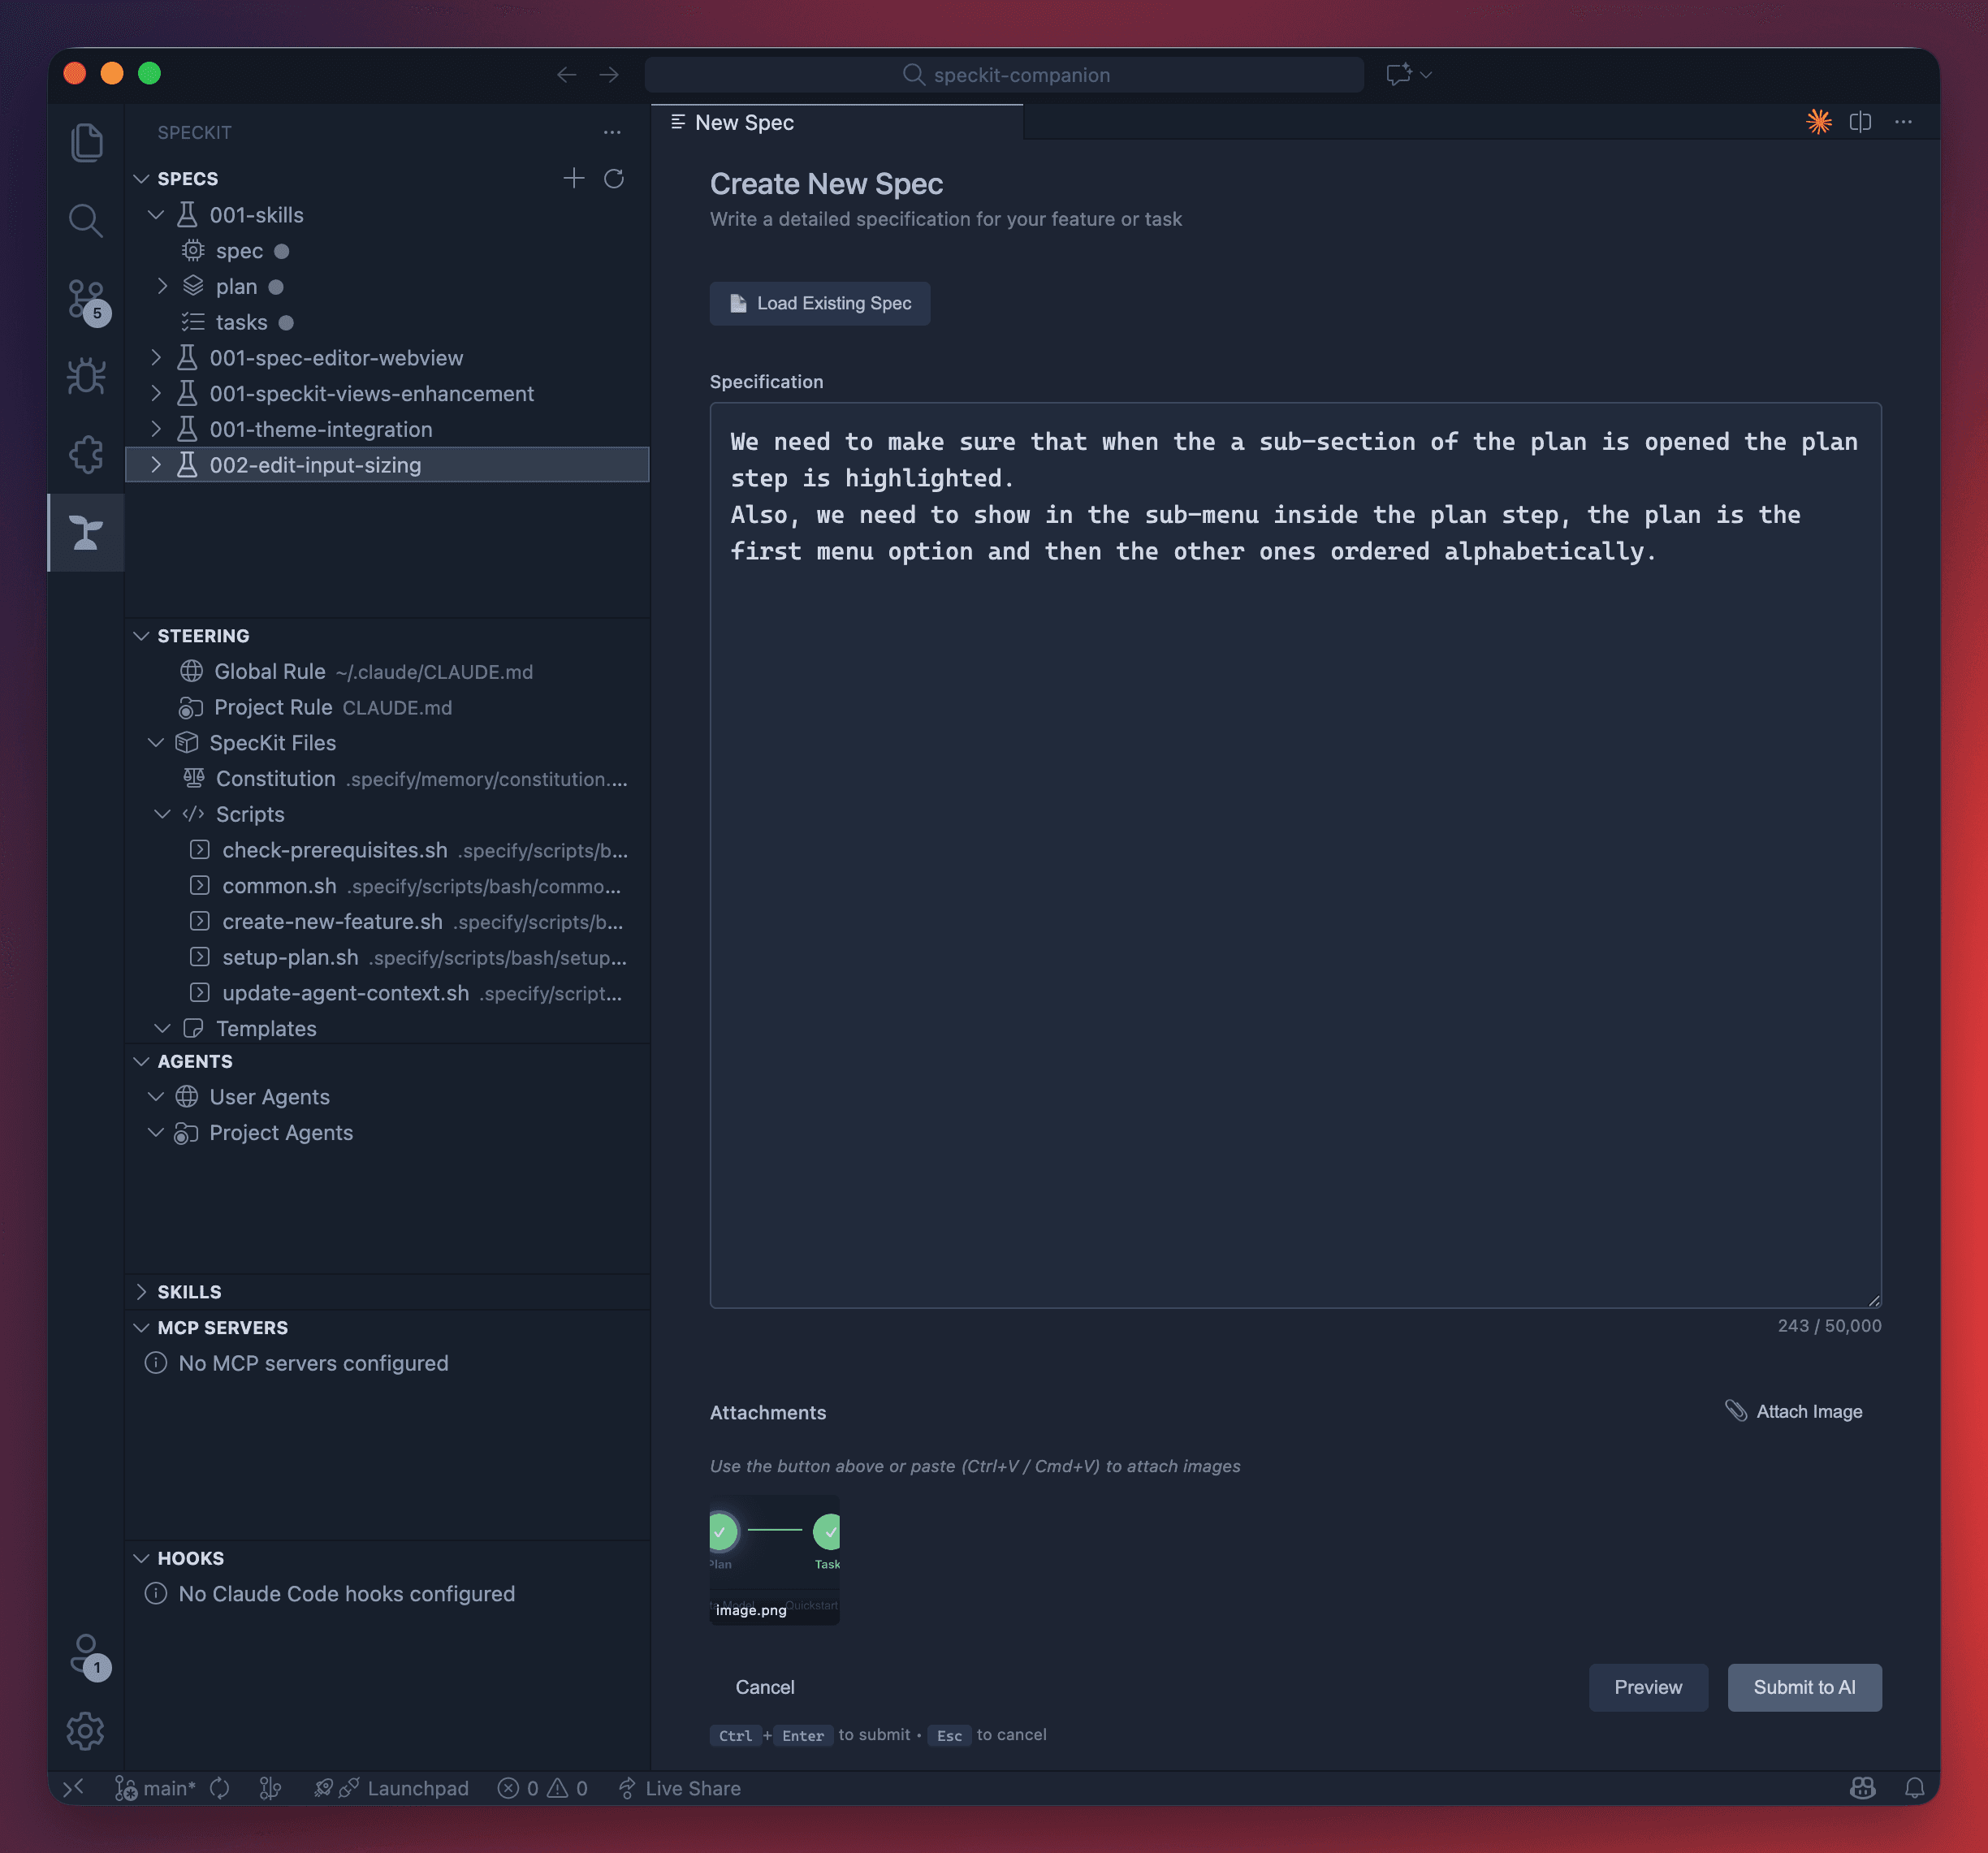
Notice the Attach Image button at the bottom—I can add screenshots or mockups to give the AI visual context. This is powerful when describing UI changes.
I write my description: "We need to make sure that when a sub-section of the plan is opened, the plan step is highlighted. Also, we need to show in the sub-menu inside the plan step that the plan is the first menu option and then the other ones ordered alphabetically."
Notice what I'm NOT saying: no mention of CSS classes, message passing implementation, or state management patterns. Just the what and why.
I click Submit to AI, and the extension generates the specification. The Workflow Editor opens showing my spec in Phase 1 of 4:
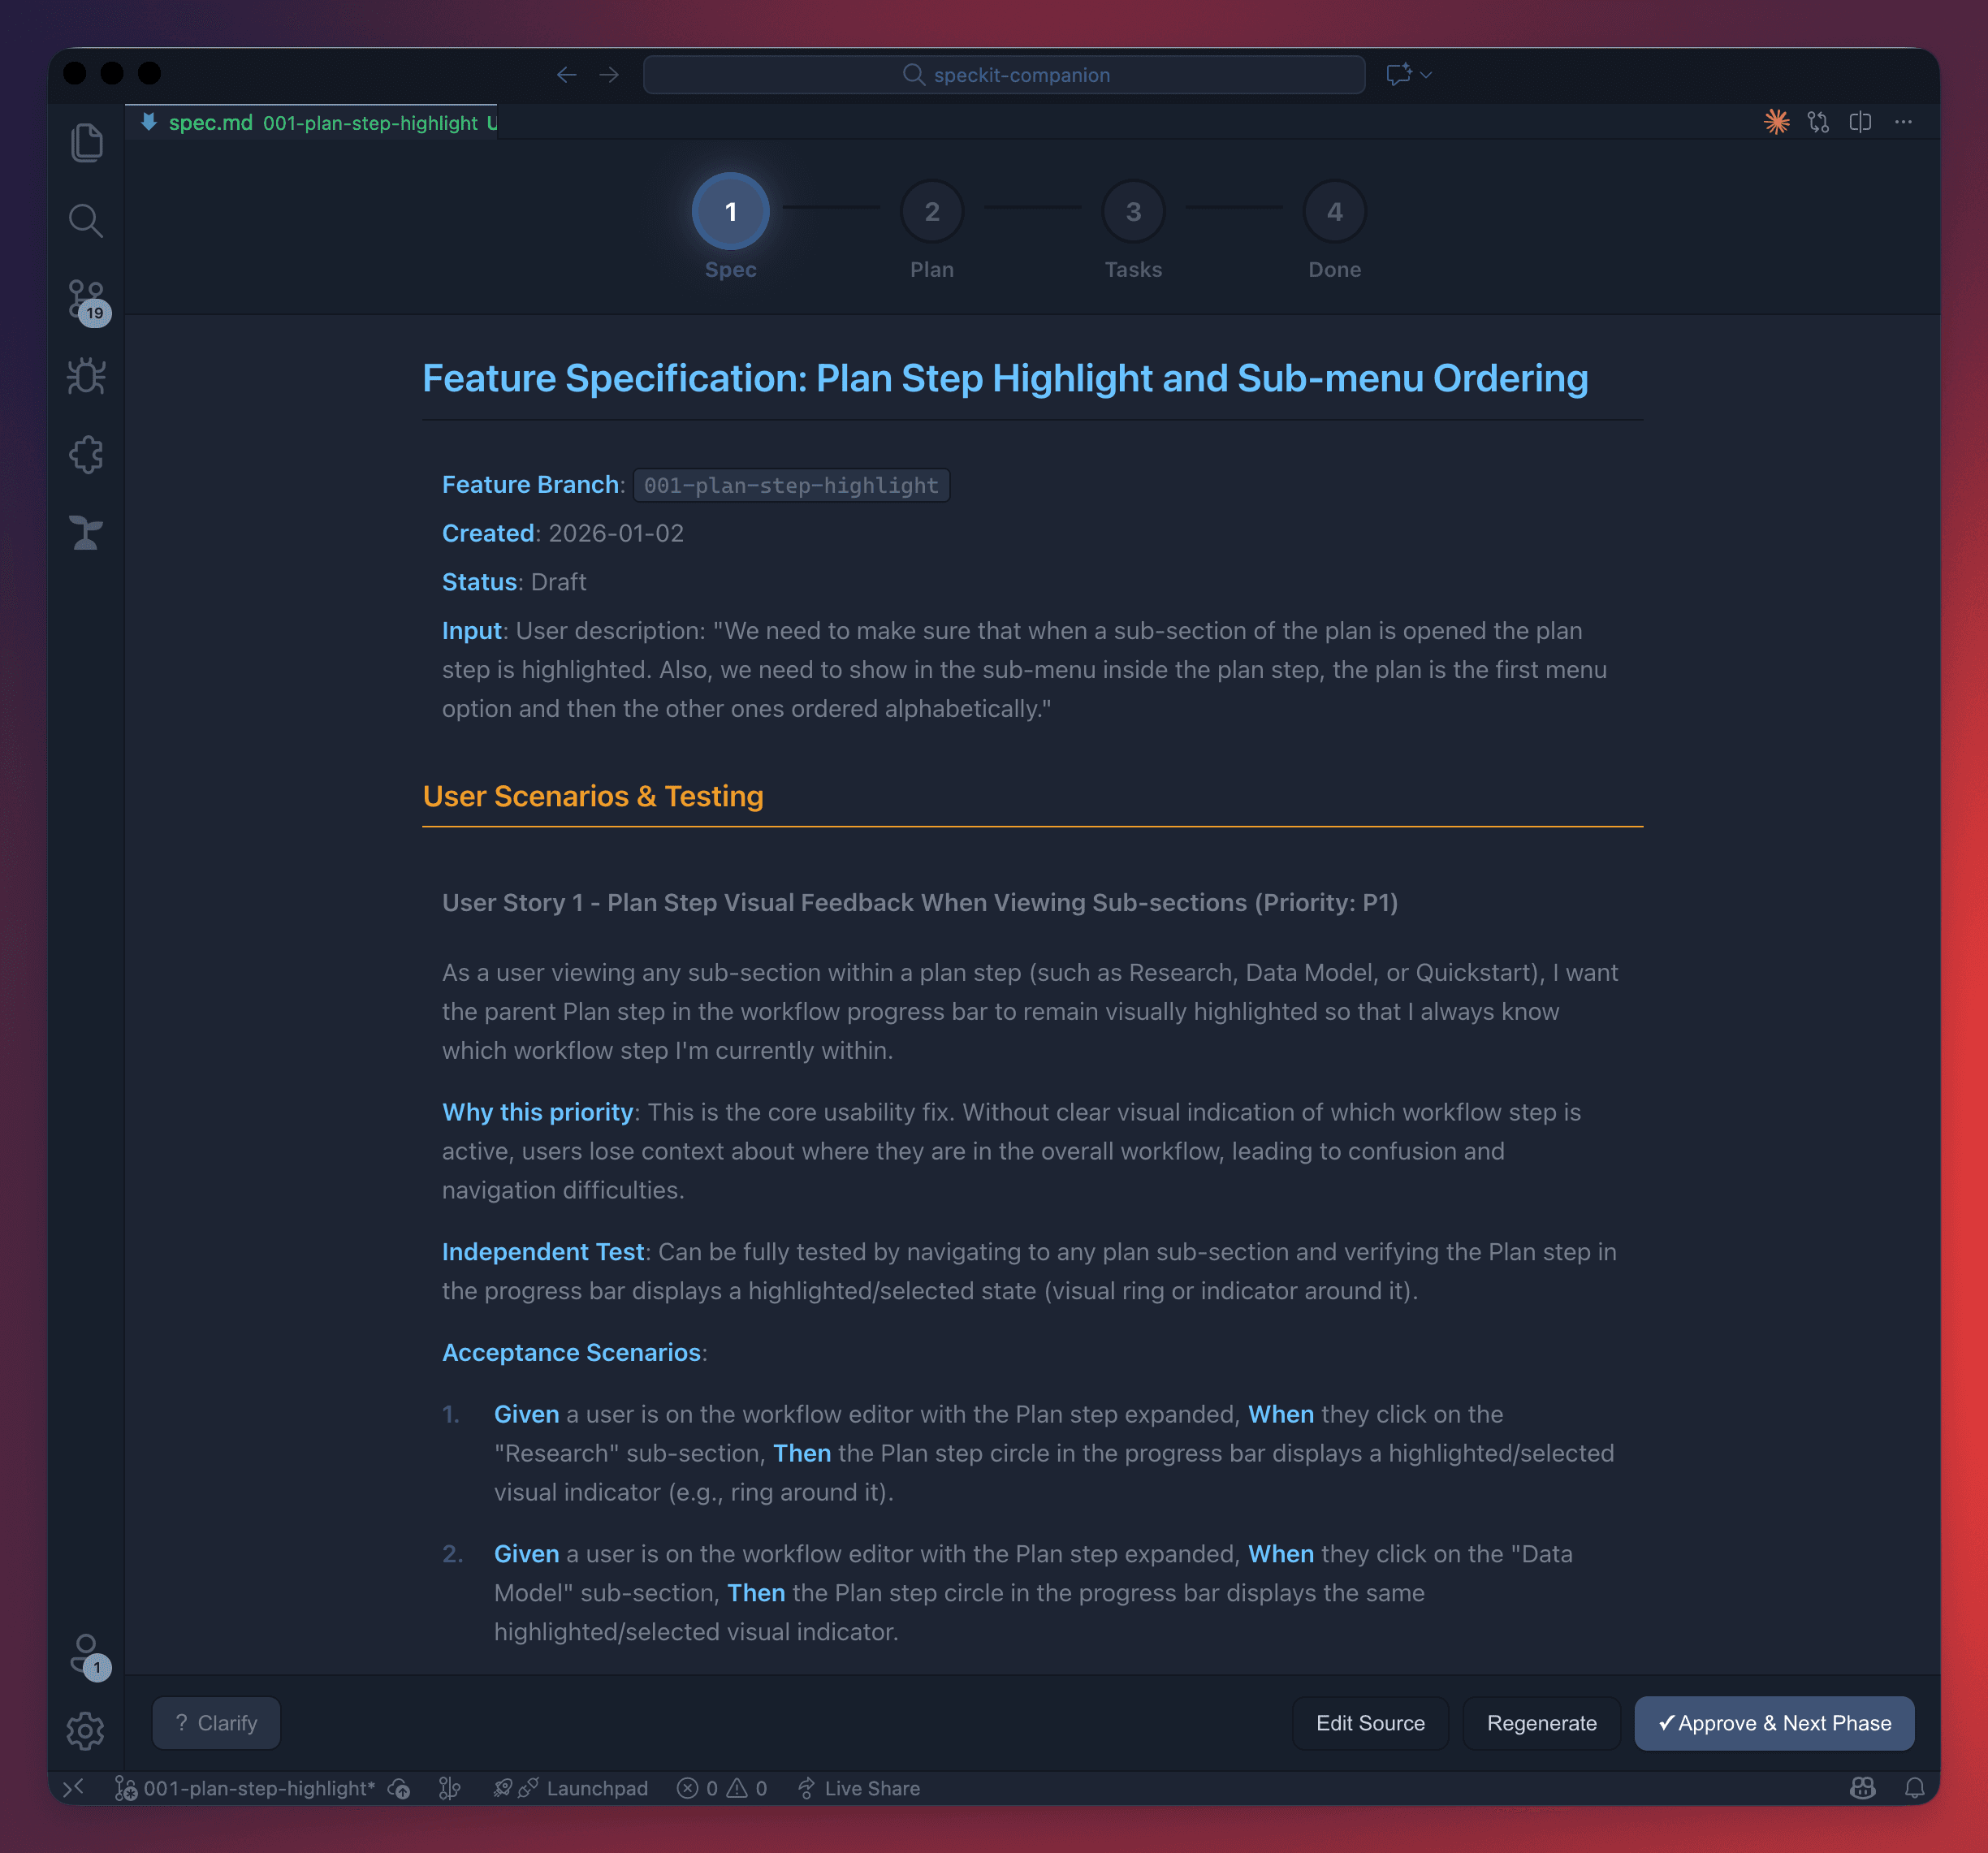
The 4-phase progress bar at the top shows where I am: Spec → Plan → Tasks → Done.
If I need to refine the spec, I can click the Clarify button to ask questions like "Should the highlight persist when switching between tabs?" The AI will help resolve ambiguities.
When I'm satisfied, I click Approve & Next Phase to move to the Plan phase.
Alternatively, you can create specs from the terminal with
/speckit.specifyfollowed by your description.
Phase 3: Plan
After clicking Approve & Next Phase, the extension automatically advances to the Plan phase. Now I make the technical decisions—this is where I specify how to implement the feature.
The Workflow Editor shows the generated Implementation Plan. Notice the tabs at the top—the Plan phase includes multiple sub-sections:
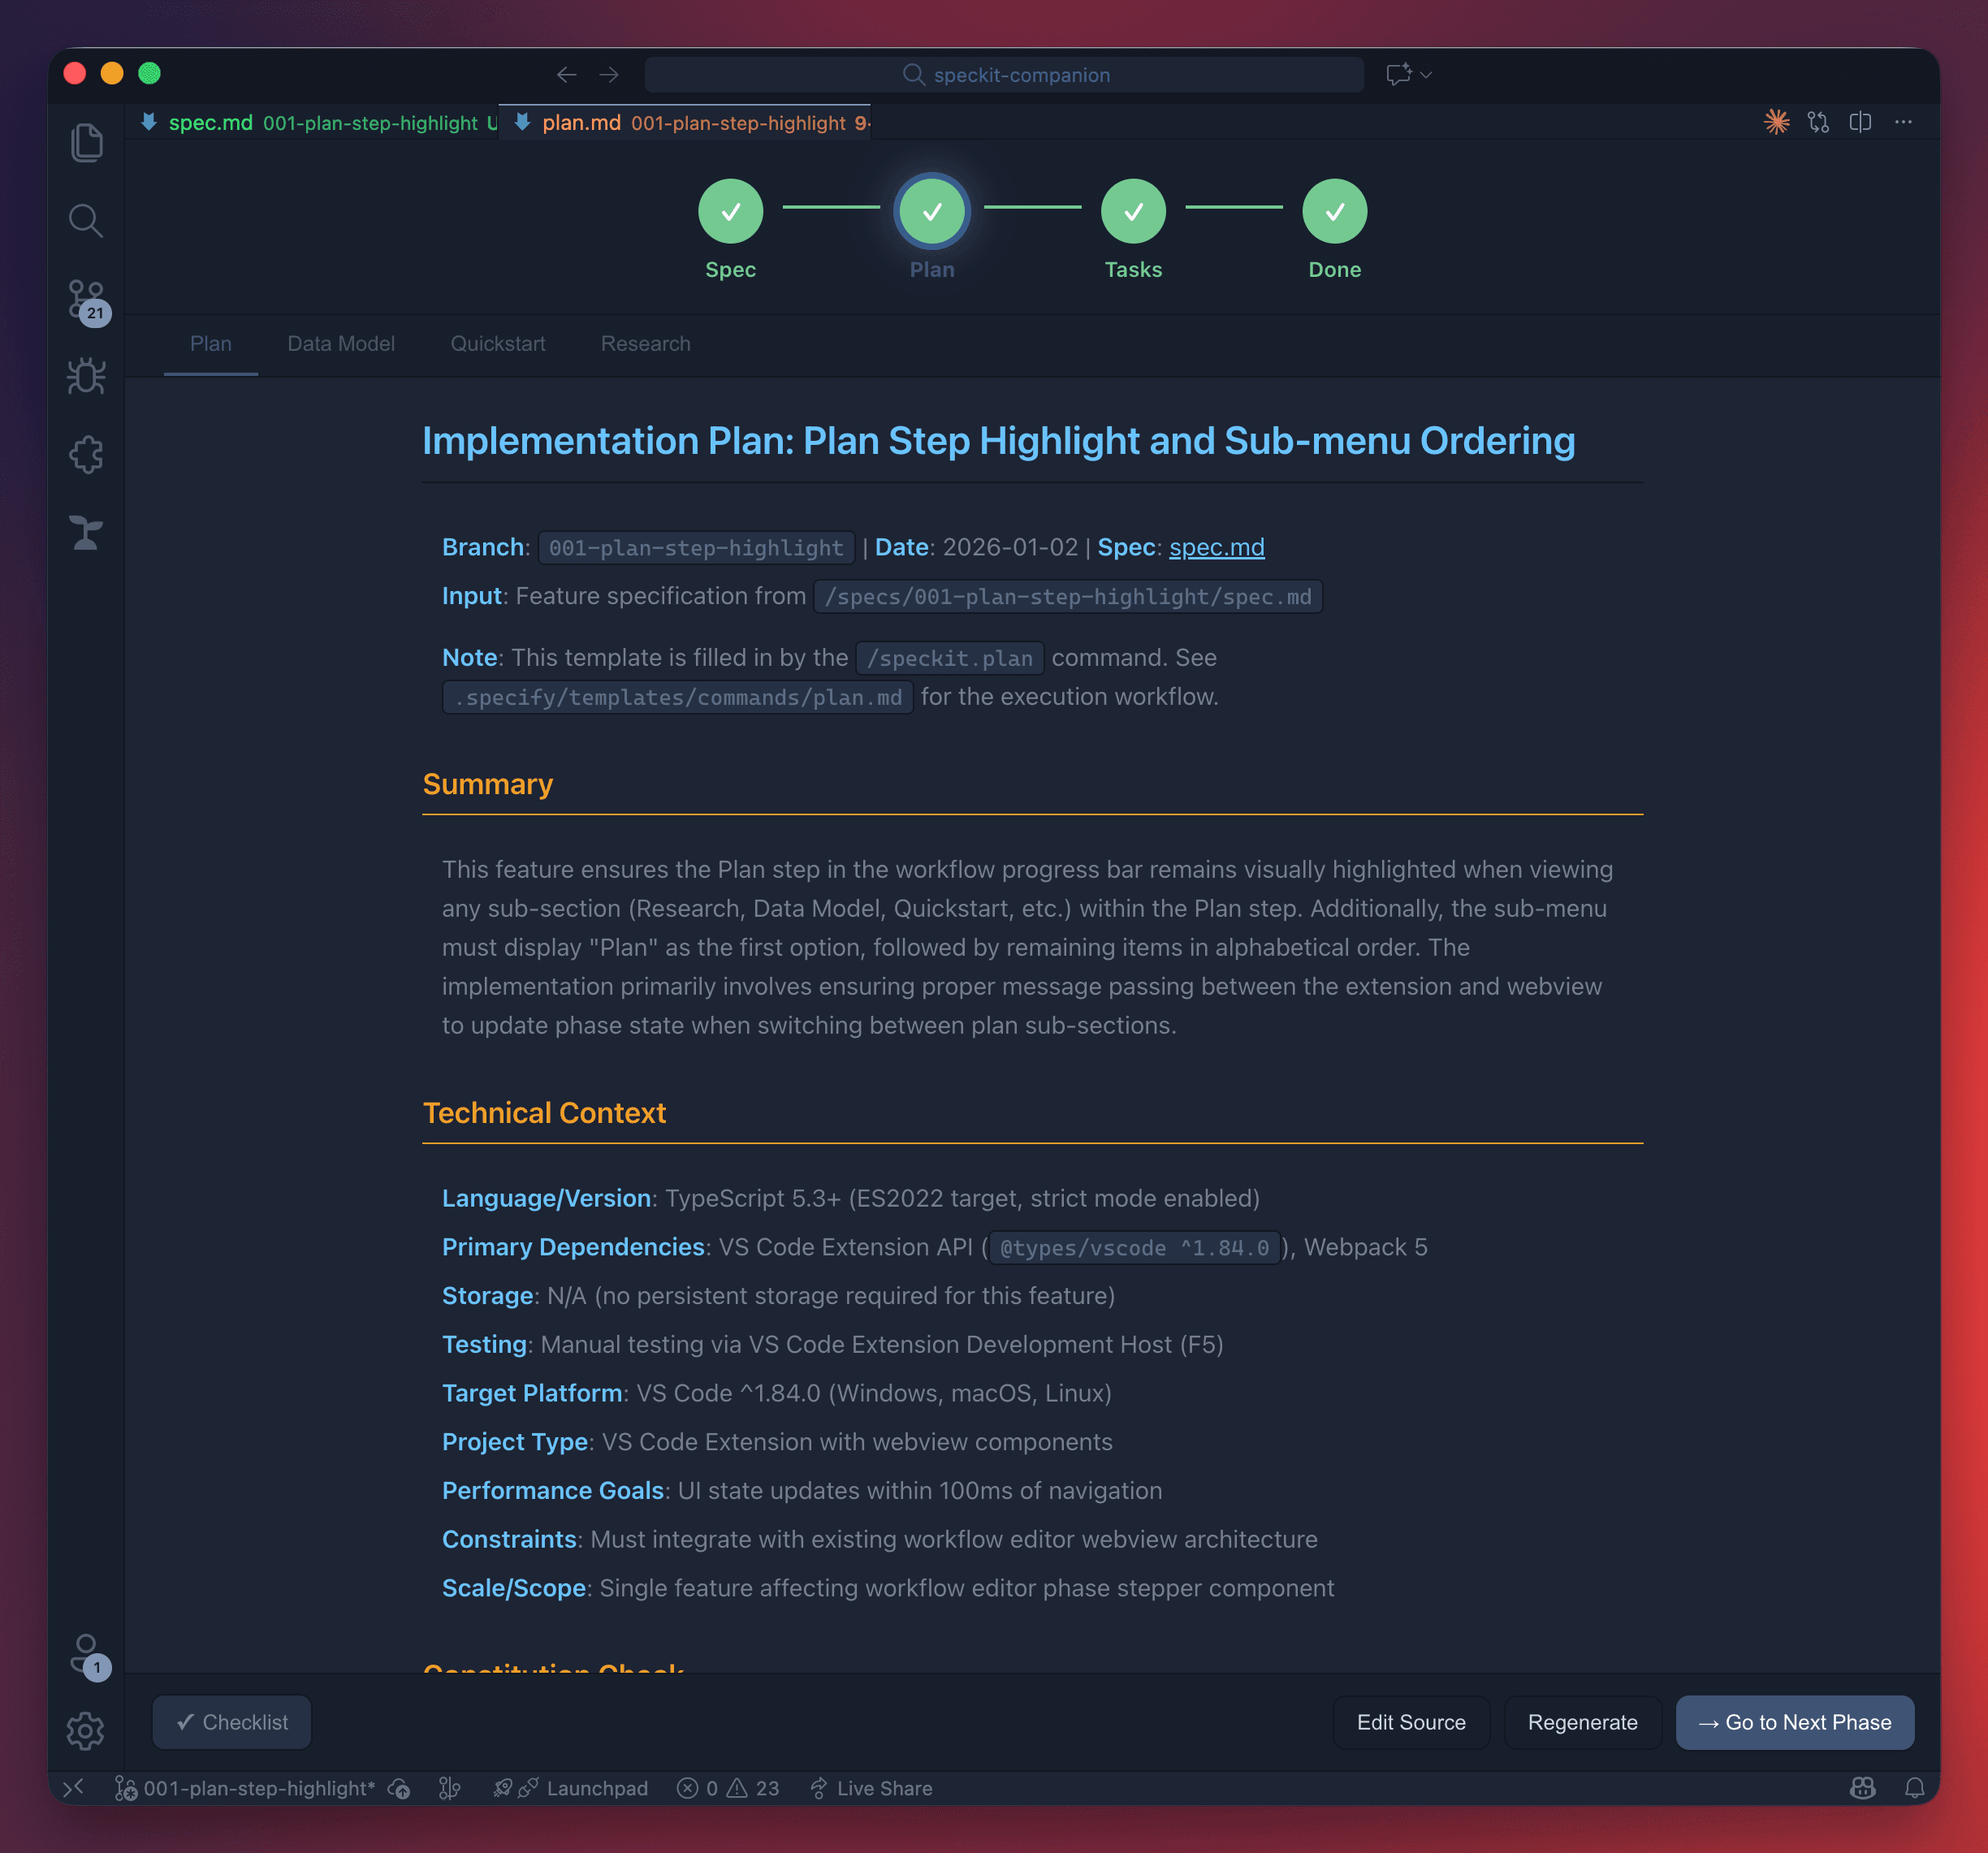
- Plan — Summary and Technical Context (language, dependencies, testing approach)
- Data Model — Data structures and schemas
- Quickstart — Quick reference for getting started
- Research — Background research and references
The plan includes architecture decisions, dependencies, and testing strategy. Notice how it references my constitution—it confirms that message passing aligns with "WebView communication" and performance targets.
If I want to validate the plan, I can click the Checklist button to generate validation checklists—like "unit tests for English" that verify my requirements are complete and consistent.
When the plan looks good, I click Go to Next Phase to proceed to Tasks.
Alternatively, you can generate plans from the terminal with
/speckit.planfollowed by your technical decisions.
Phase 4: Tasks
The Tasks phase opens automatically after approving the plan. The extension generates .specify/specs/001-plan-step-highlight/tasks.md—a breakdown with ordered tasks and dependencies, markers for tasks that can run in parallel, and a test-driven development structure built right in.
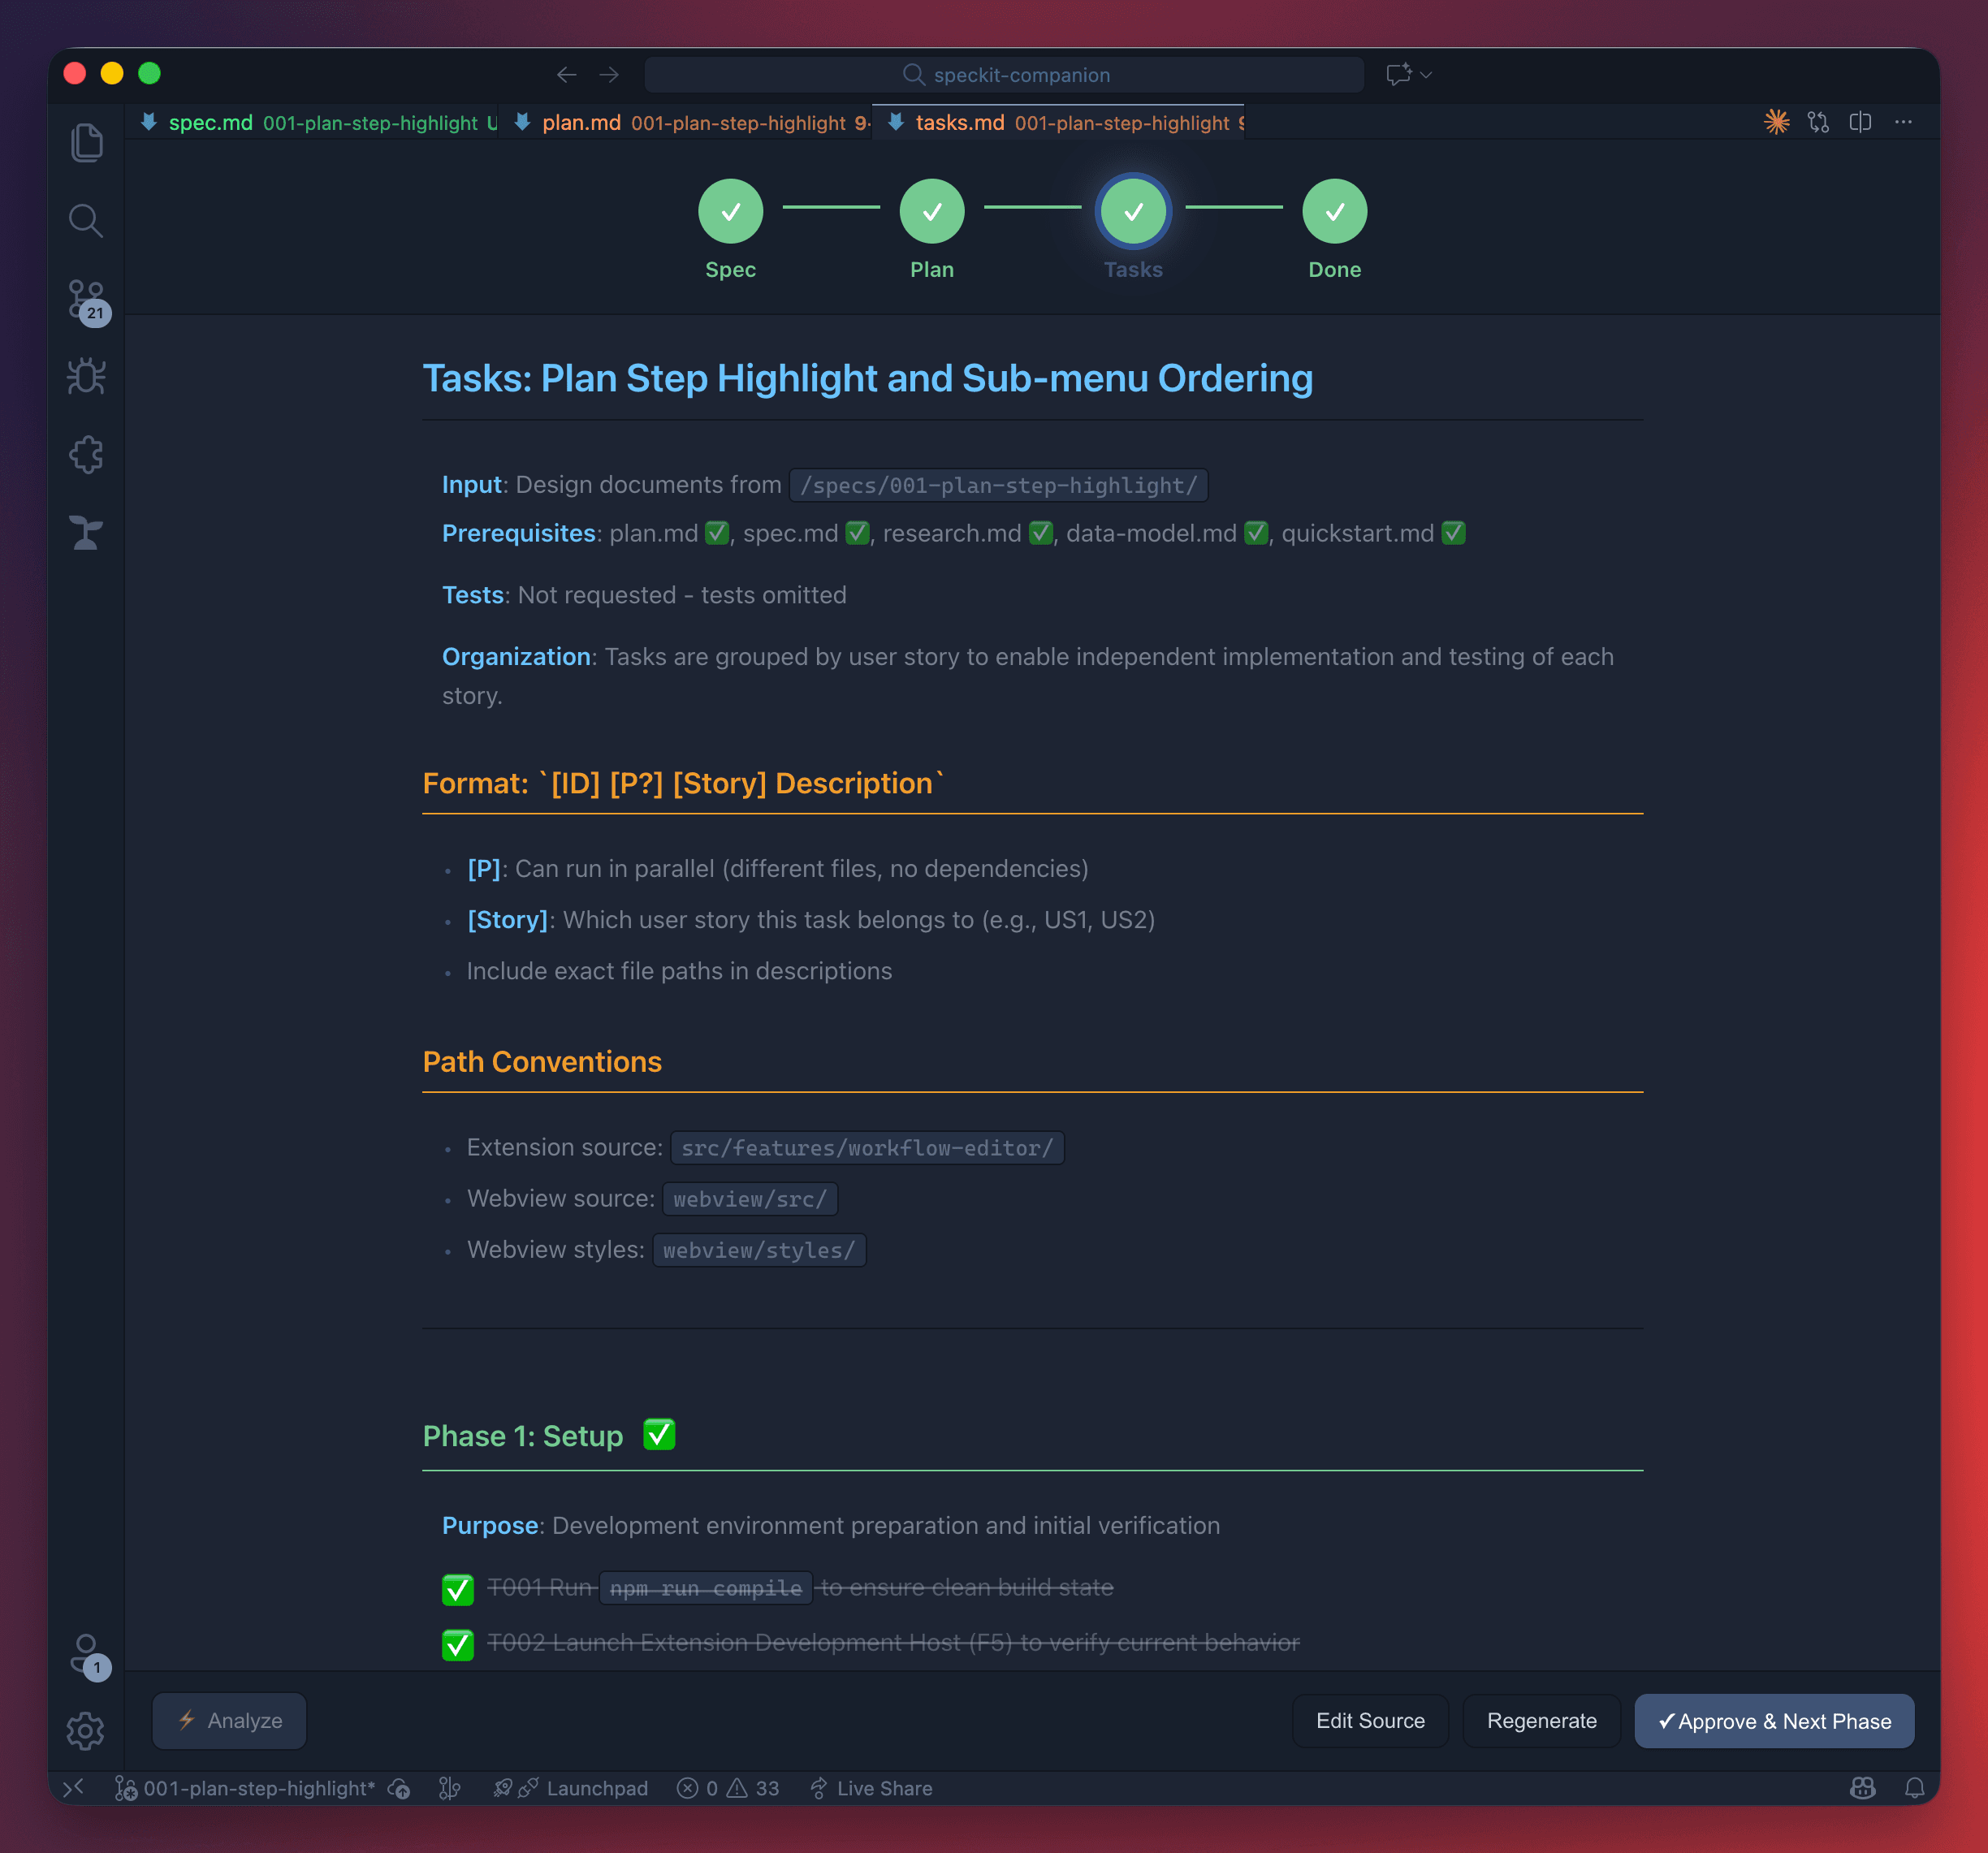
Tasks are organized by phases (Setup, Core Implementation, etc.) with clear dependencies. The format shows which tasks can run in parallel and which user story each task belongs to.
Before implementing, I can click the Analyze button to run a cross-artifact consistency check—this validates that my spec, plan, and tasks all align properly.
The tasks are editable. If I want to reorder something or add a task, I click Edit Source and modify the markdown directly.
When ready, I click Approve & Next Phase to complete the workflow.
Alternatively, you can generate tasks from the terminal with
/speckit.tasks.
Phase 5: Implement
After clicking Approve & Next Phase in Tasks, the workflow advances to the Done phase—all four circles in the progress bar are now checked. My spec, plan, and tasks are ready for implementation.
From here, I can:
- Copy the tasks to paste into my AI assistant
- Open in Claude Code (or your preferred AI) directly from the extension
- Run
/speckit.implementin the terminal to let the AI execute the plan systematically
The AI works through each task in order, respecting dependencies. Because it has full context from the spec and plan, it knows exactly what I want and why.
Project Structure
Here's what the .specify folder looks like after going through the workflow:
.specify/
├── memory/
│   └── constitution.md      # Project principles
└── specs/
    └── 001-plan-step-highlight/
        ├── spec.md          # Requirements (what/why)
        ├── plan.md          # Technical strategy (how)
        ├── tasks.md         # Implementation roadmap
        ├── data-model.md    # Data structures
        ├── quickstart.md    # Quick reference
        └── research.md      # Background research
The key benefit? All files are editable markdown—you're not locked into AI-generated content. They're version control friendly, so you can branch and iterate on specs before implementing. Your team can review and contribute to specs. And if requirements change, you just update the spec and re-run—no starting from scratch.
What's Different?
Compare this to vibe coding:
| Vibe Coding | Spec-Driven |
|---|---|
| "Highlight the step" → hope AI understands | Explicit spec defines exactly what highlighting means |
| 5-10 iterations to get it right | 1-2 refinements with clear context |
| No documentation | Living docs in .specify/ |
| Next session starts from scratch | Specs persist and evolve |
| "It works... I think?" | Implementation matches verified spec |
SpecKit Companion: More Than Workflow
The extension does more than guide you through specs. The sidebar gives you quick access to everything in your project:
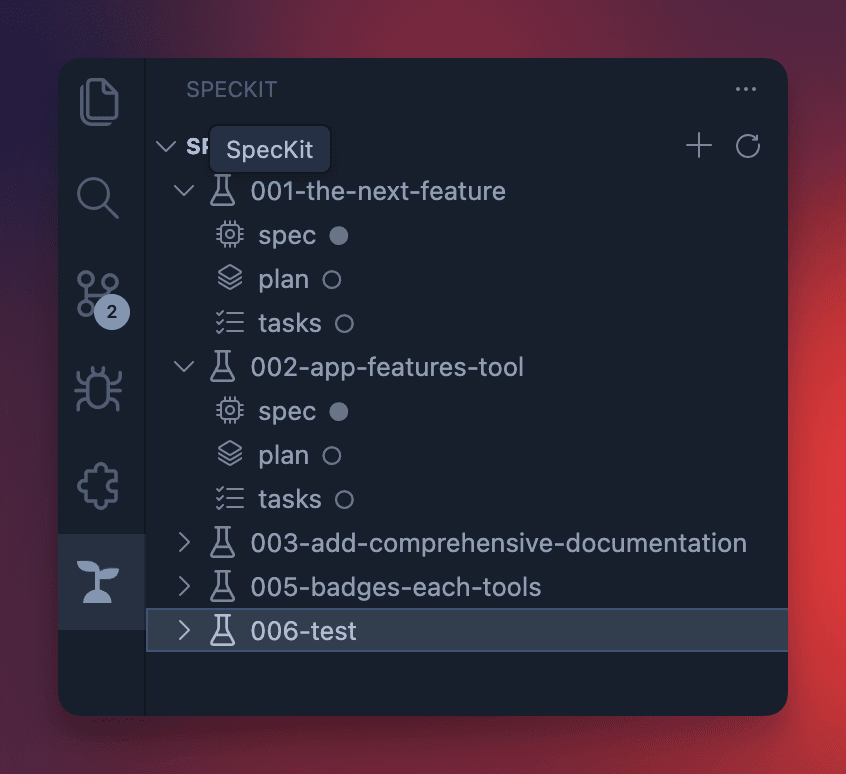
- Specs — Browse all your specifications with their plan and tasks
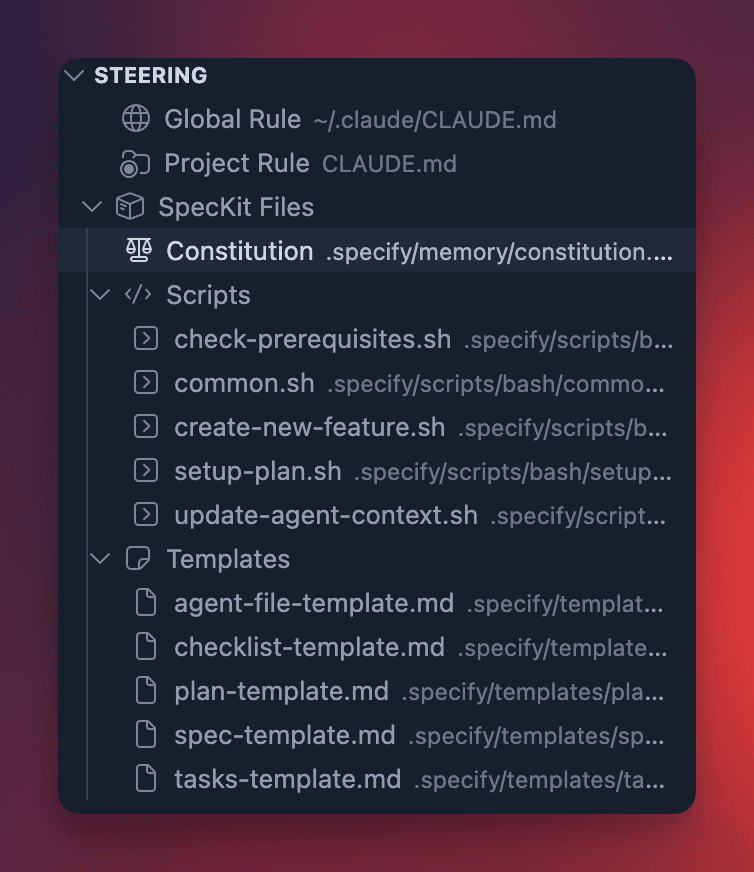
- Steering — Access your constitution, project rules, and shared scripts
- Agents — Configure user and project-level AI agents
- Skills — Manage MCP servers for extended capabilities
- Hooks — Set up Claude Code hooks for automation
We'll dive deeper into each of these features in the next article.
Conclusion
Spec-driven development transforms how you work with AI. Instead of hoping the AI understands your intent, you make sure it does—with explicit specifications that become living documentation.
For my plan step highlight feature, I went from a vague idea to a clear spec, a technical plan, and an ordered task list—all before writing a single line of implementation code. When the AI finally implemented the feature, it had full context about what I wanted and why.
Your specs become the single source of truth. They're reviewable, version-controlled, and collaborative. And when requirements change (they always do), you update the spec and re-run—instead of starting from scratch.
Ready to stop vibe coding?
- spec-kit on GitHub — The CLI toolkit
- SpecKit Companion — VS Code extension for visual workflow
- Kiro — AI IDE built around spec-driven development
Next up: A deep dive into SpecKit Companion's sidebar—agents, skills, hooks, and more.